SSO
Documentation to integrate Kamsa with various SSO providers
Caveat:
The Kamsa SSO system does not support IdP initiated SSO (users first log in to their company's dashboard, which presents an application catalog). Instead, users must come to the Kamsa login page to initiate the login process.
View Instructions For:
Okta - OIDC
-
Once into your Okta account, go to the Admin panel
-
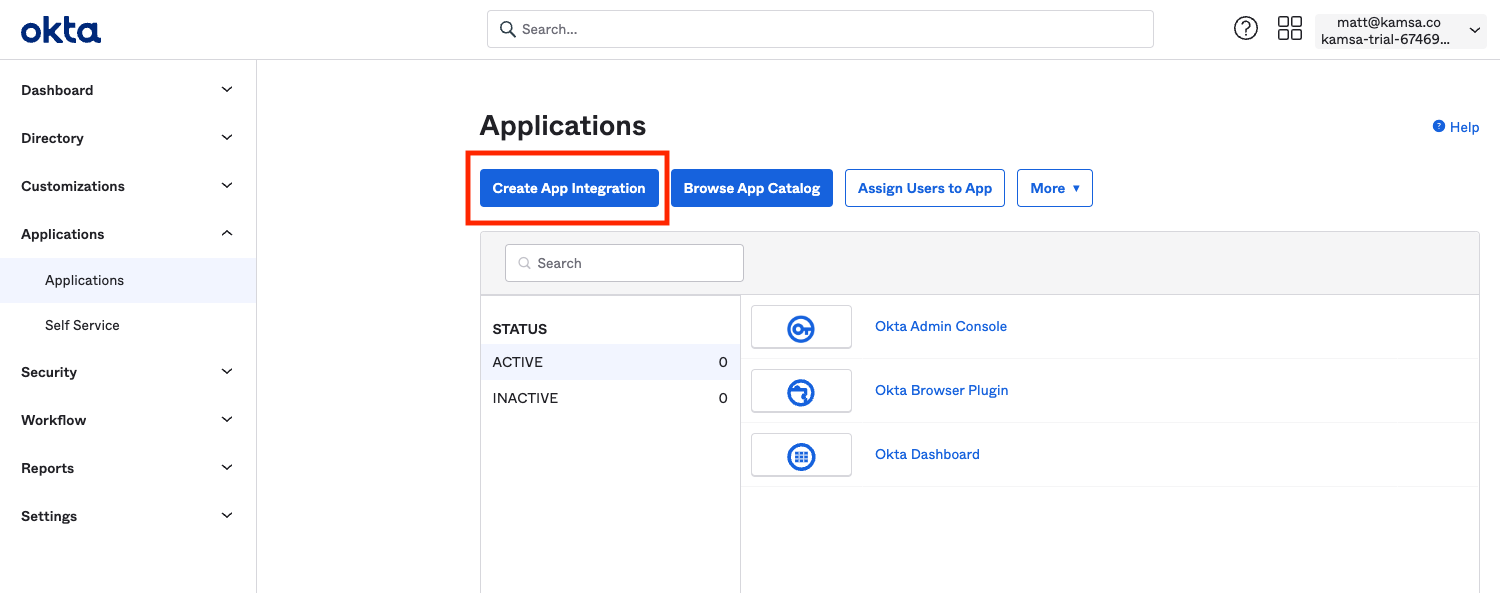
Click "Create App Integration" under the "Applications" left nav
-
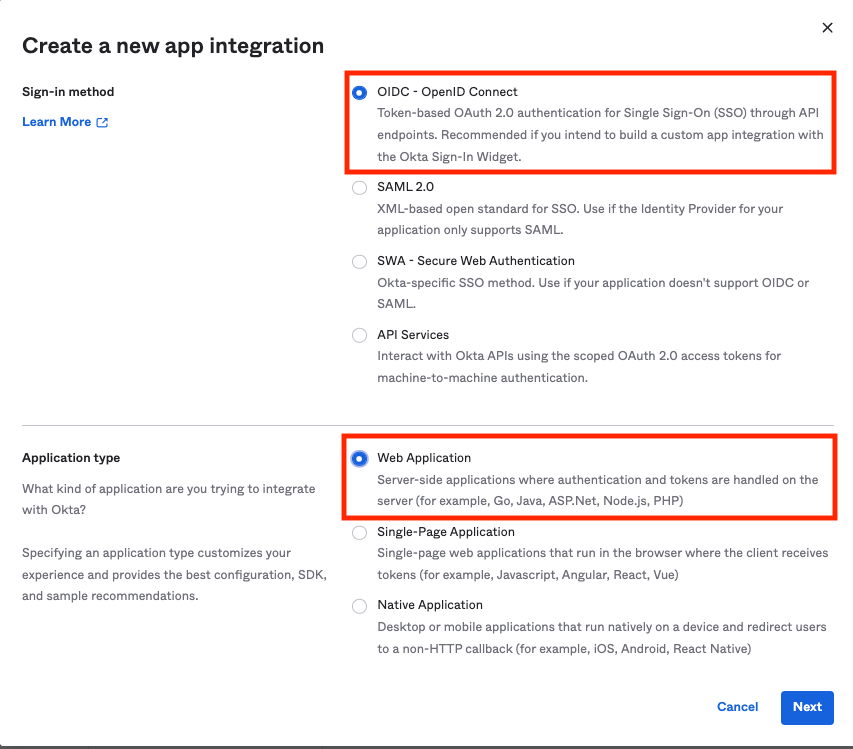
Select OIDC for "Sign-in method" and "Web Application" for "Application Type"
-
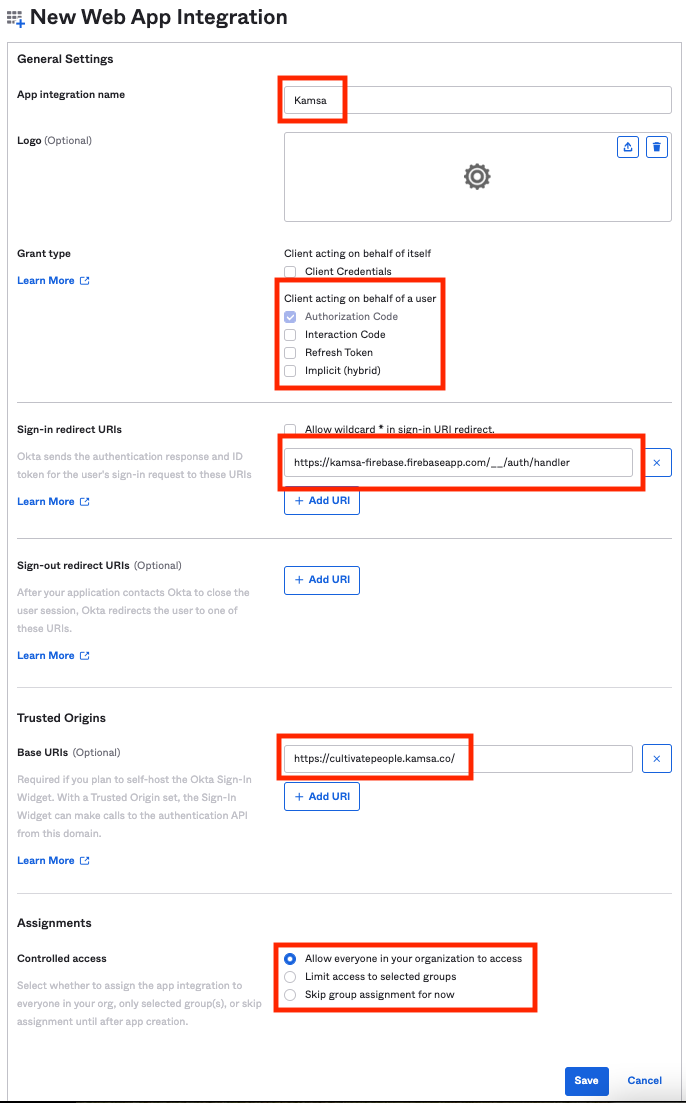
Next, add appropriate settings for the application
- Add an app name. This can be whatever you like.
- Optional to add our logo (attached)
- Ensure "Authorization Code" is the only "Grant Type" selected
- Use "https://kamsa-firebase.firebaseapp.com/__/auth/handler" as the "Sign-in redirect URIs"
- Use "https://cultivatepeople.kamsa.co/" for "Trusted Origins" (ensure the trailing slash is present)
- Setting "Controlled Access" is optional. Kamsa will not allow a user from your organization unless we have already created an account for them, so allowing "everyone" is totally fine.
-
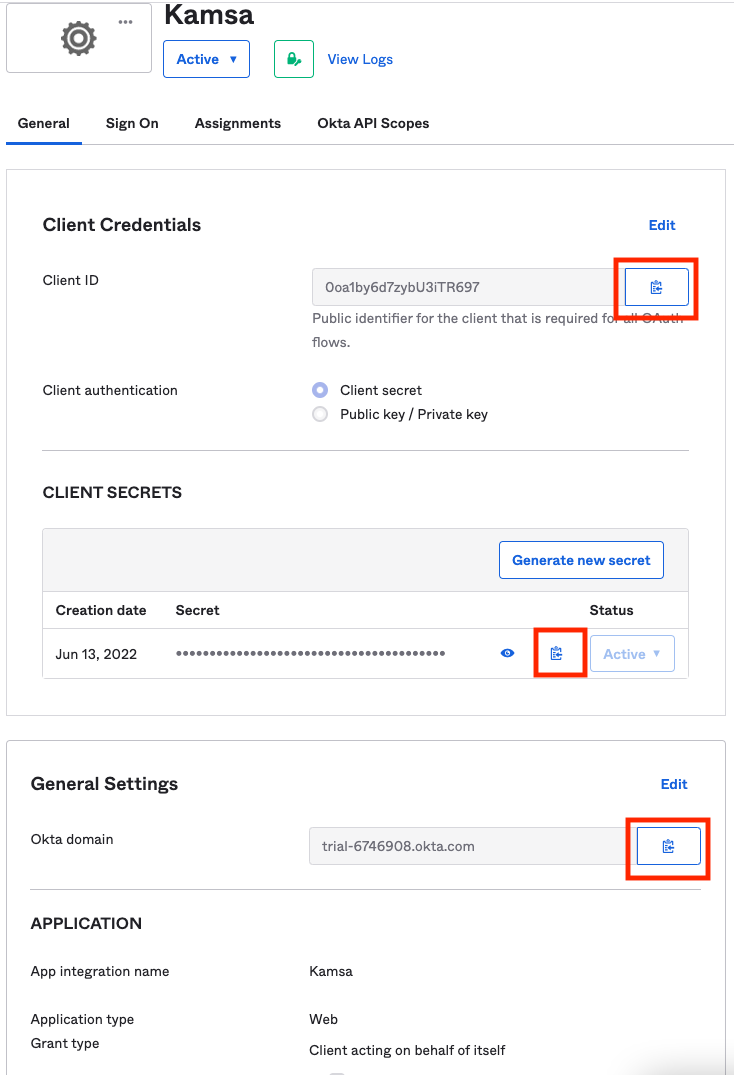
Copy and send the following to our tech team @ [email protected]:
- Client ID
- Client Secret
- Okta Domain

Okta - SAML
-
Once into your Okta account, go to the Admin panel
-
Click "Create App Integration" under the "Applications" left nav
-
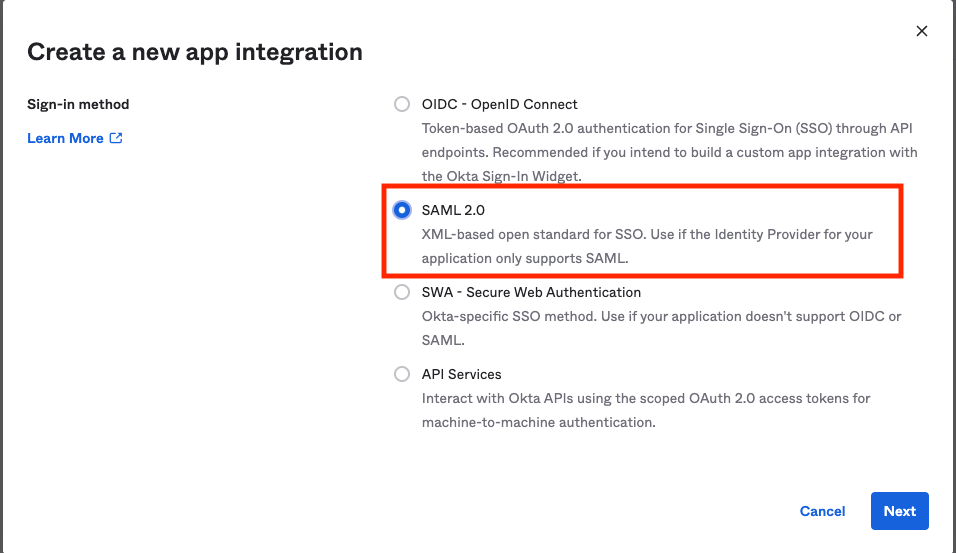
Select "SAML 2.0" for "Sign-in method" and "Web Application" for "Application Type"
-
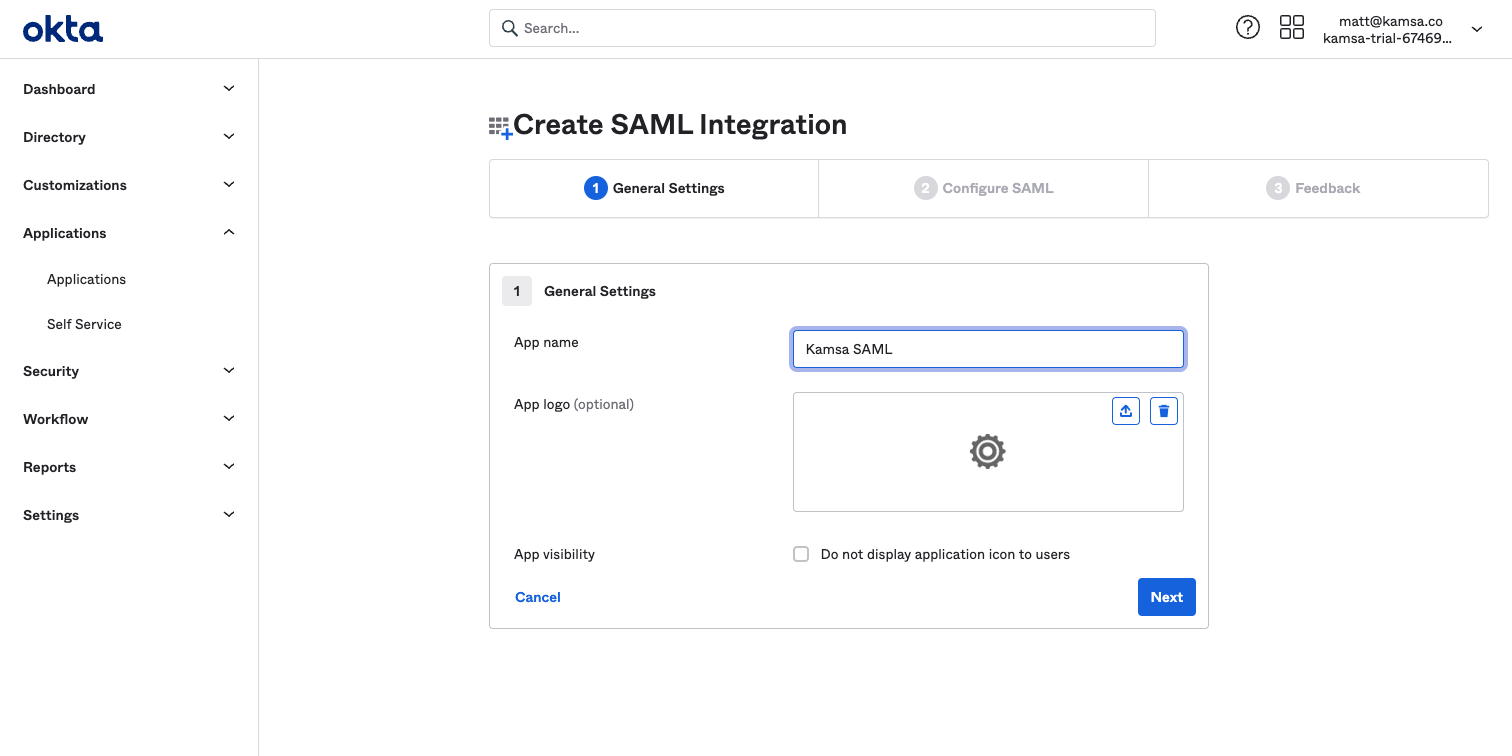
Next, add appropriate settings for the application
- Add an app name. This can be whatever you like.
- Optional to add our logo
- Click Next
-
Complete SAML Configuration
- Enter "https://kamsa-firebase.firebaseapp.com/__/auth/handler" for "Single sign on URL"
- Enter "https://cultivatepeople.kamsa.co/" (with trailing slash) for "Audience URI"
- Unless needed, you can leave the rest of the settings as default
- Click Next

-
Complete Feedback Section
- Select "I'm an Okta customer adding an internal app"
- You can leave the optional questions blank
- Click Finish
-
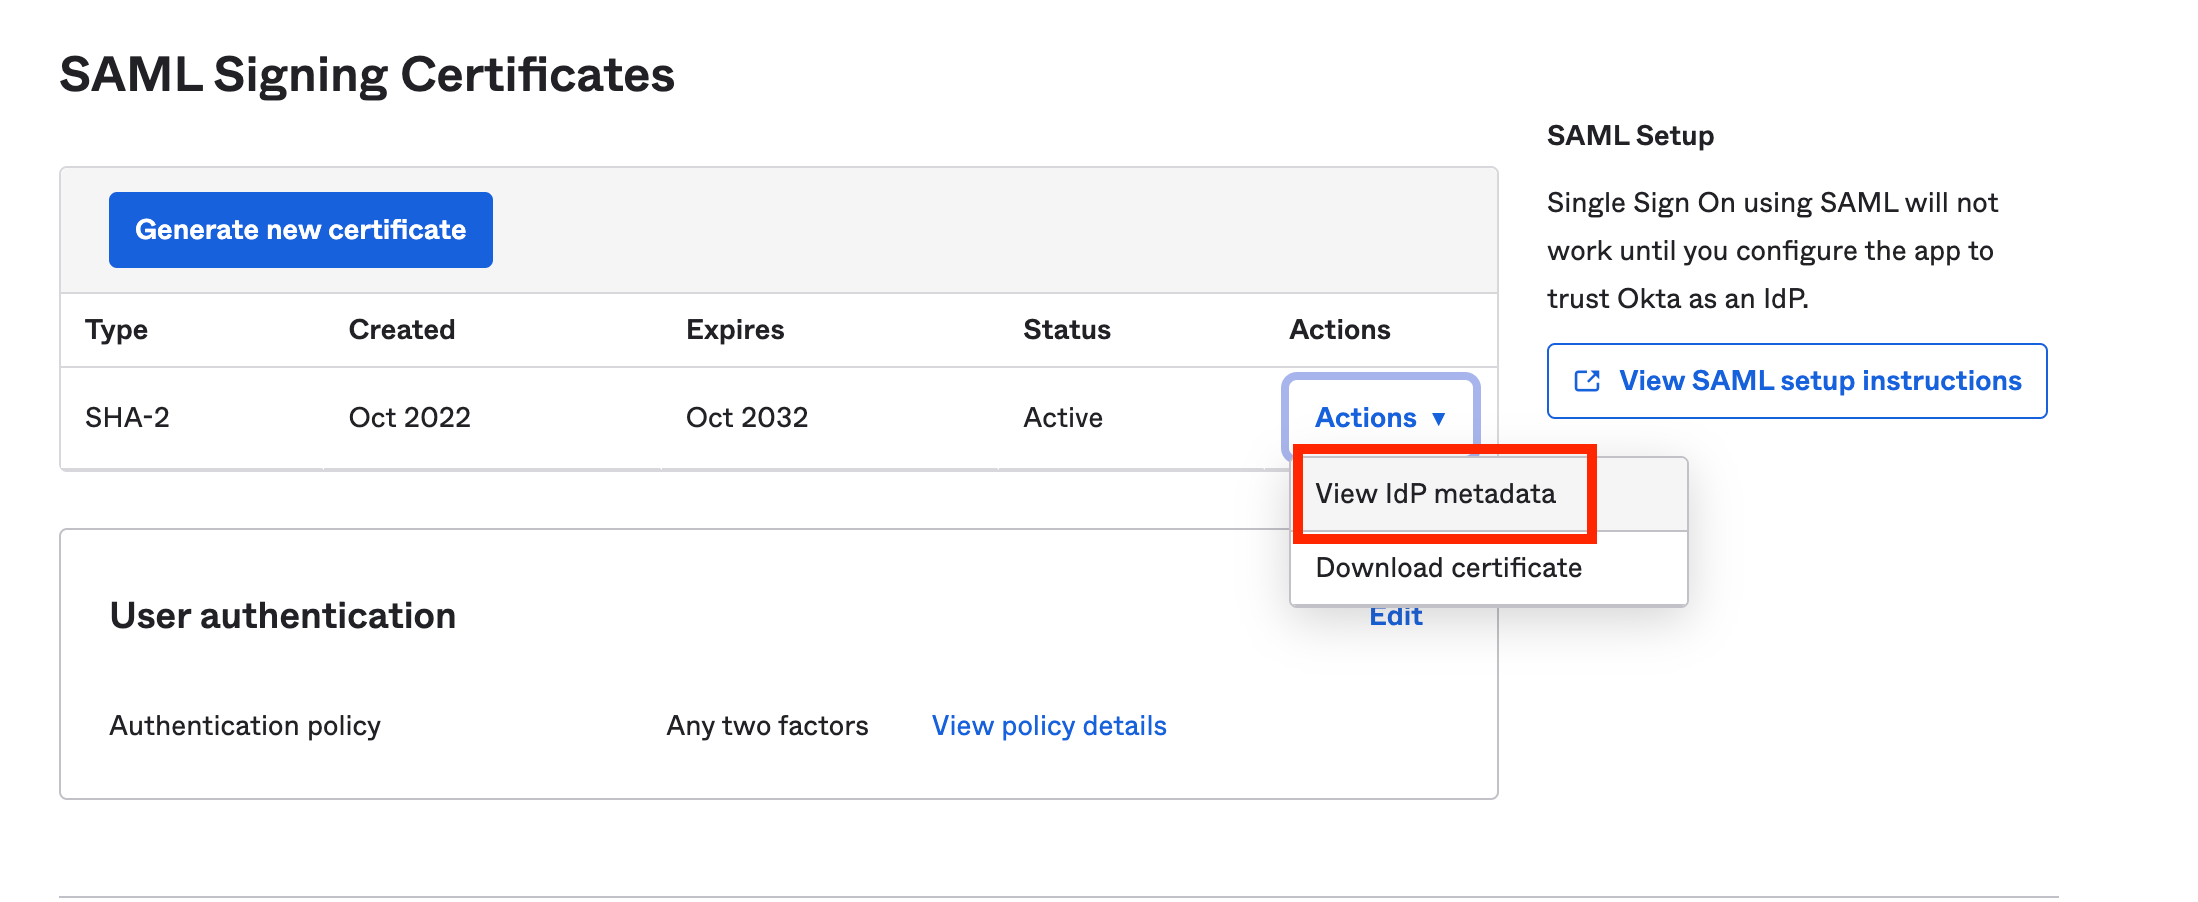
Gather Signing Certificates
- From the "Actions" dropdown next to the appropriate certificate, select "View IdP metadata". You will need to copy & paste this information and send it to our tech team @ [email protected].
-
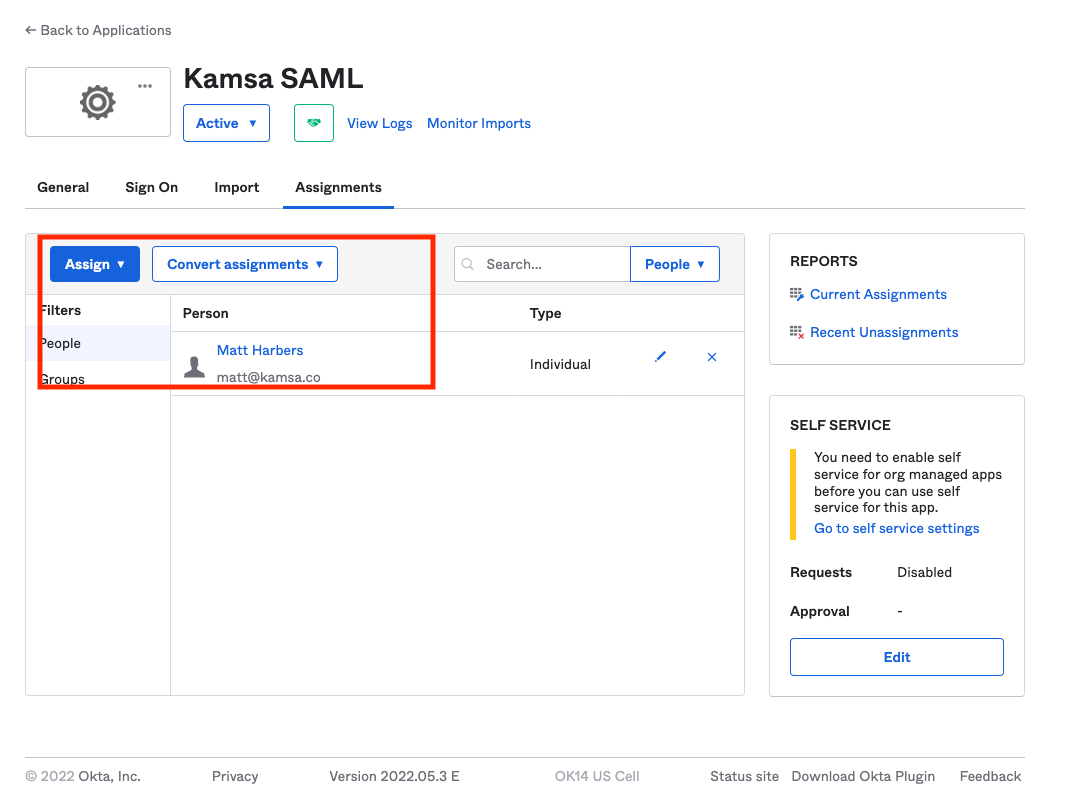
Assign Users
- From the "Assignments" tab at the top of the page, assign users or groups of people who should have access to Kamsa
- For convenience, you can include all of your users. Only those who have been provisioned an account in Kamsa will get access.
Please send the Certificate you downloaded to our tech team @ [email protected].
Azure - SAML
-
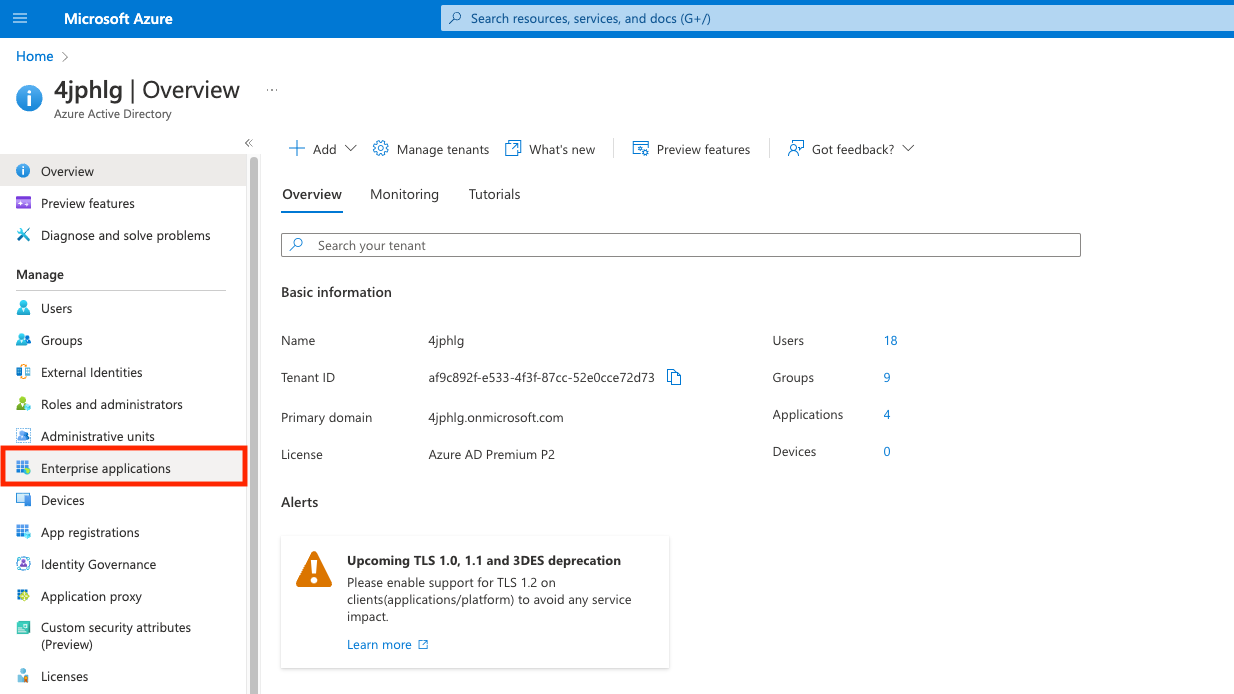
Sign into Azure portal
-
Search for and select Azure Active Directory
-
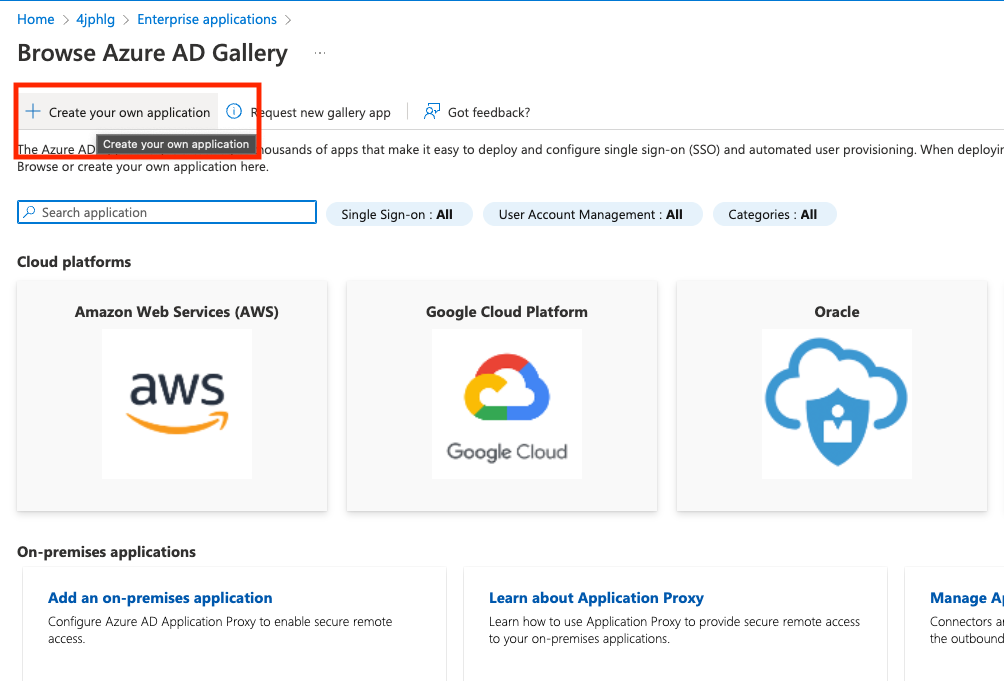
Create an "Enterprise Application" in Azure Active Directory
-
-
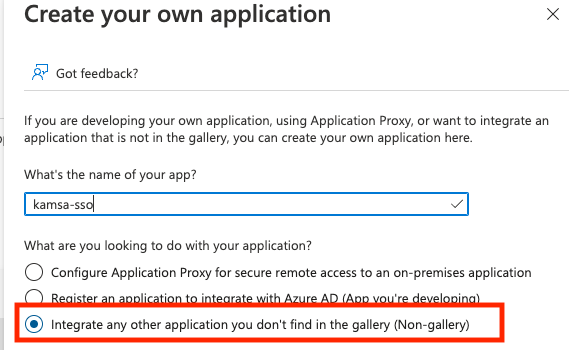
Make sure to select a "Non-gallery" application. The name of the app can be anything you like and we do not need to know what it is.
-
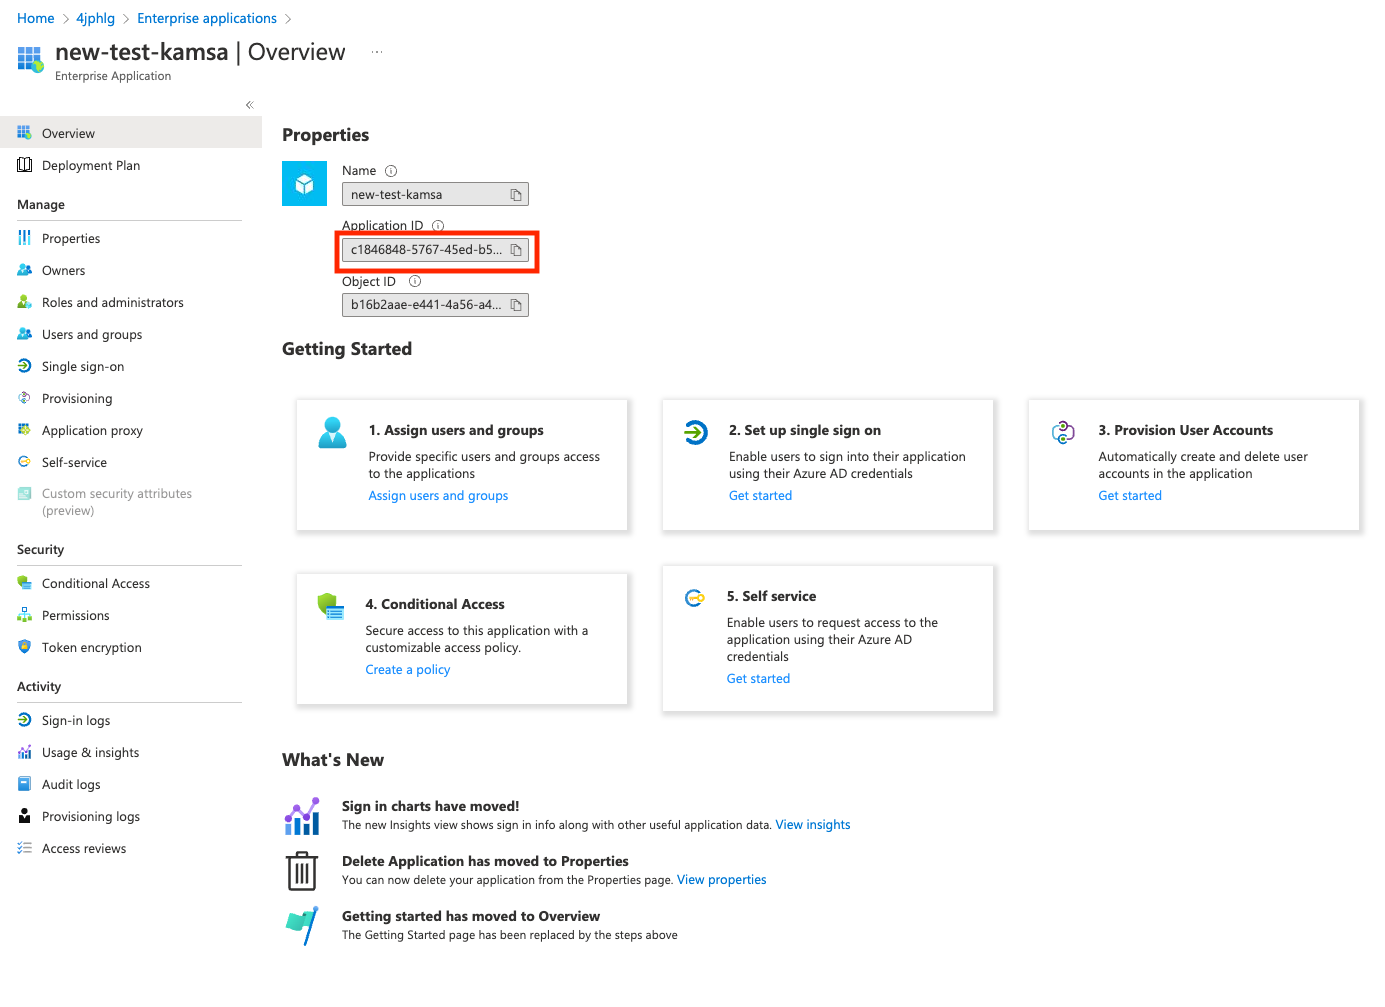
Make note of the "Application ID" once you enter the application you created.
-
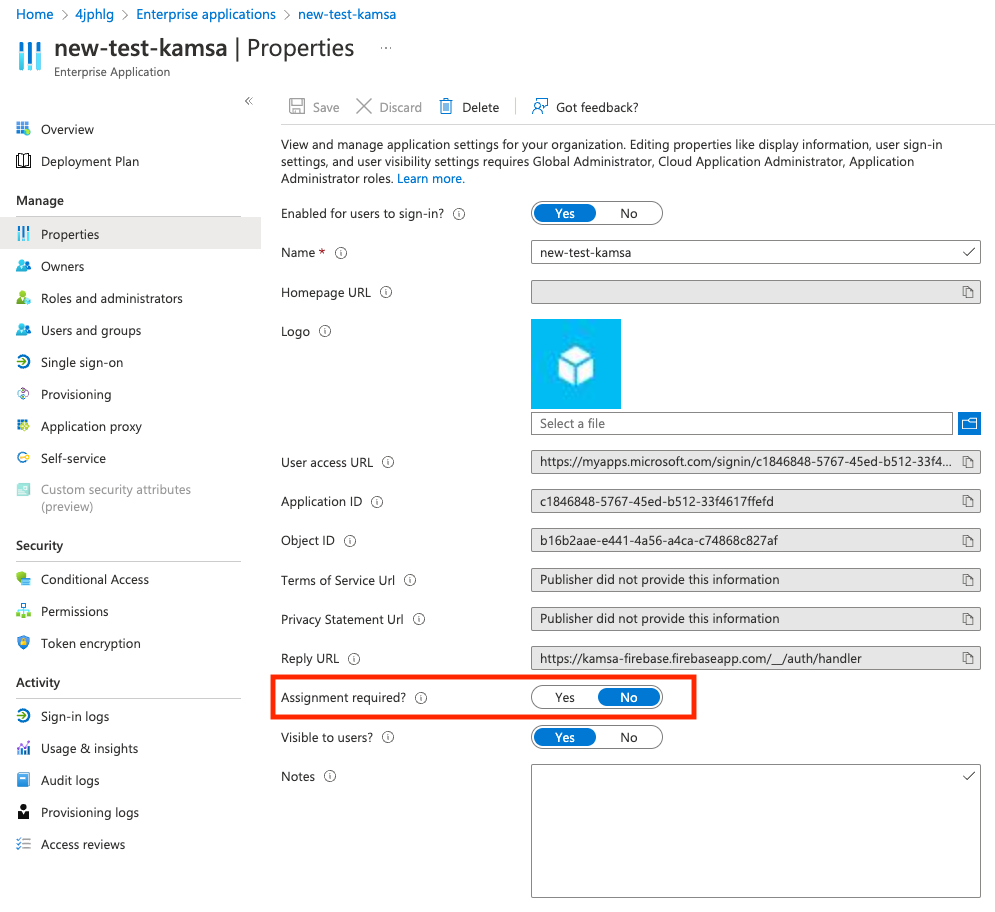
Optional Step 4a
- Click on "Properties" and choose a value for "Assignment Required?" and click save
- Even if you select "No", users WILL NOT be able to log in to Kamsa unless an HR Admin has already created a user account for them inside Kamsa.
- Selecting "No" will just save a step in the future from your side.
-
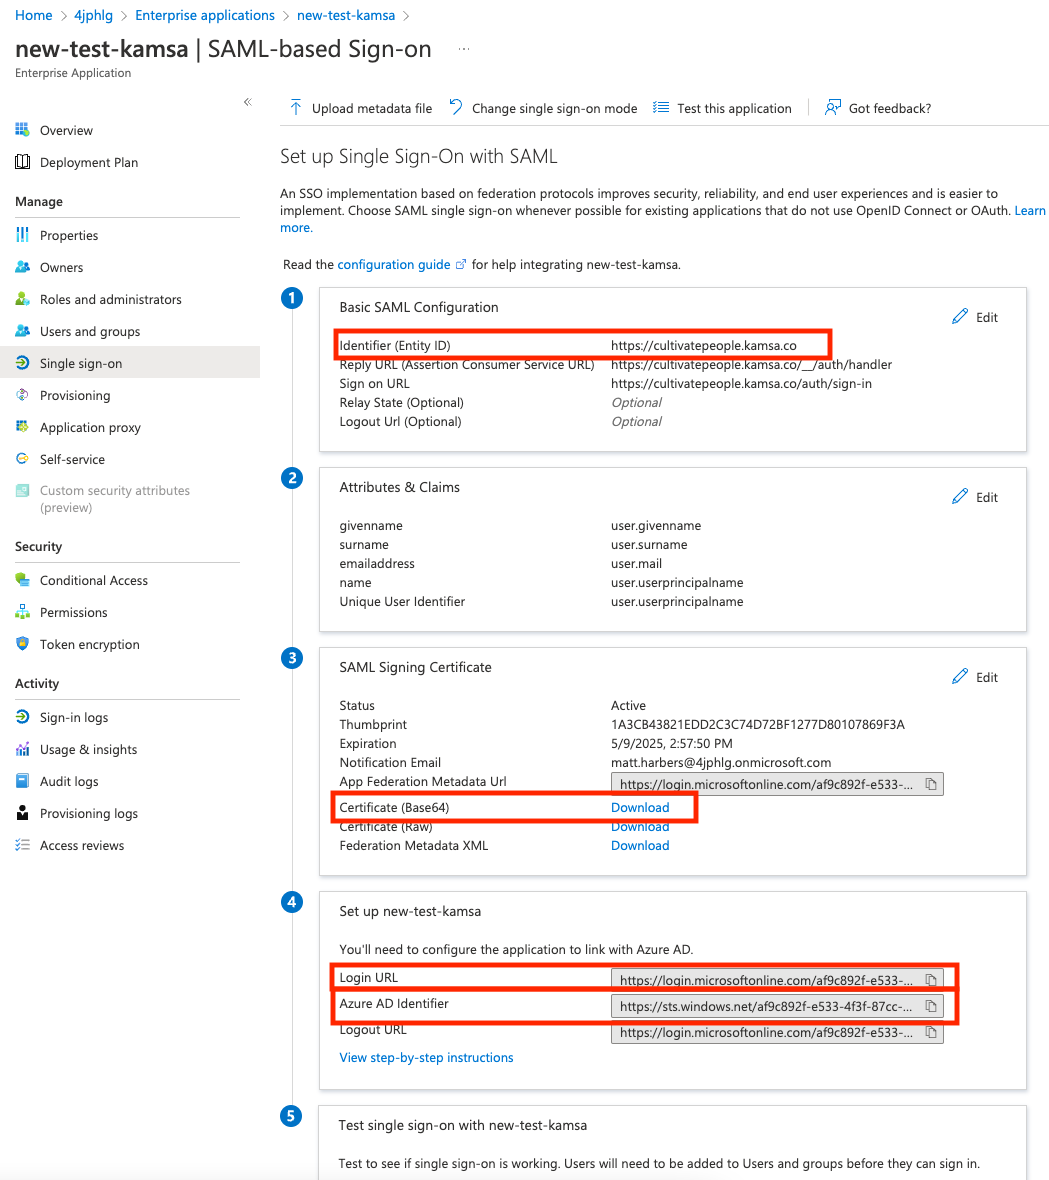
Click on "Single sign-on" in the left nav and click "Edit" next to "Basic SAML Configuration".
- Add an "Identifier (Entity ID). This can be anything, but we need this value
- Enter "https://kamsa-firebase.firebaseapp.com/__/auth/handler" in "Reply URL"
- Optional, but you can add the Kamsa "Sign On Url" (https://kamsa-firebase.firebaseapp.com/__/auth/handler)
- Click Save

-
Step 5a - Import/Change/Etc New SAML Signing Certificate
- You may choose to create a new cert or not, but we'll need it sent to us if it's not the same one as before
-
Make Note of the following values and send to our tech team @ [email protected]:
- Identifier (Entity ID)
- Certificate Downloaded for Step 5a
- Login URL
- Azure AD Identifier
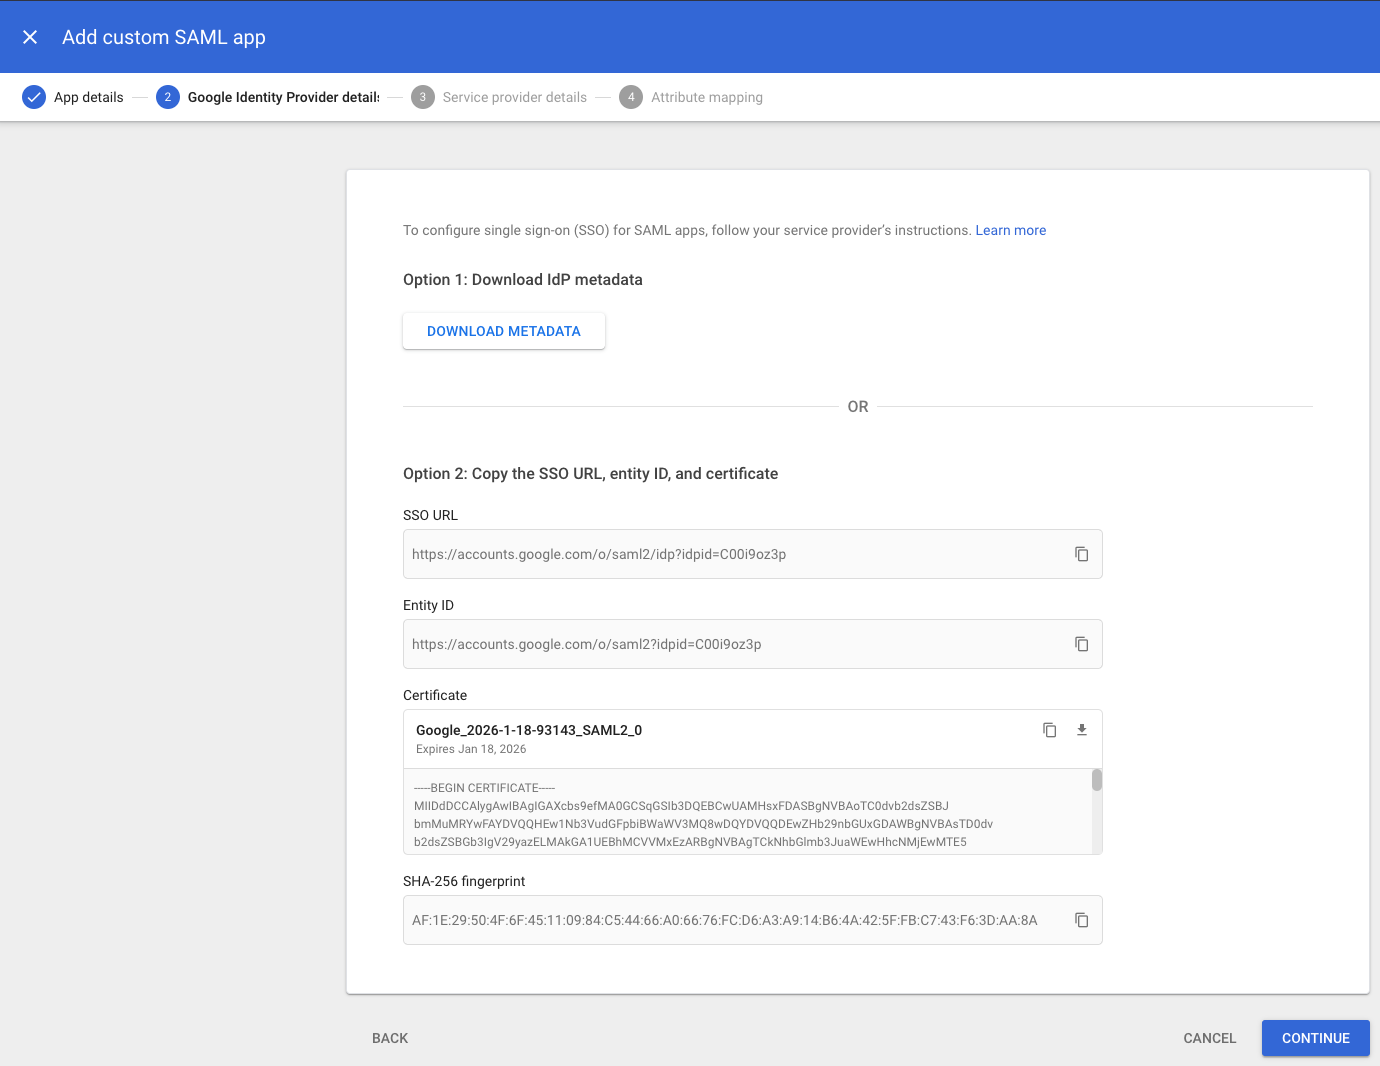
Google - SAML
-
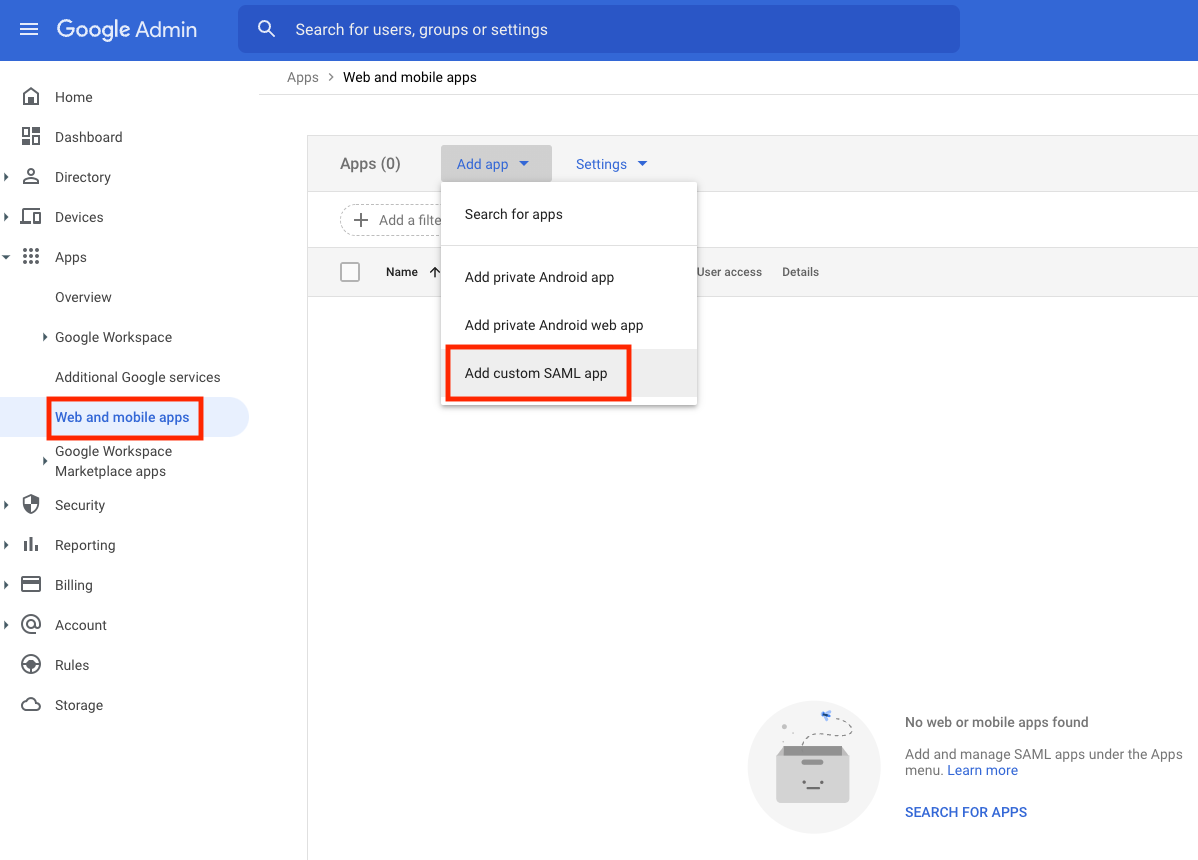
Once into your Google account (admin.google.com), expand the "Apps" menu in the left navigation menu, and click "Web and mobile apps"
-
Click "Add app" and click "Add custom SAML app"
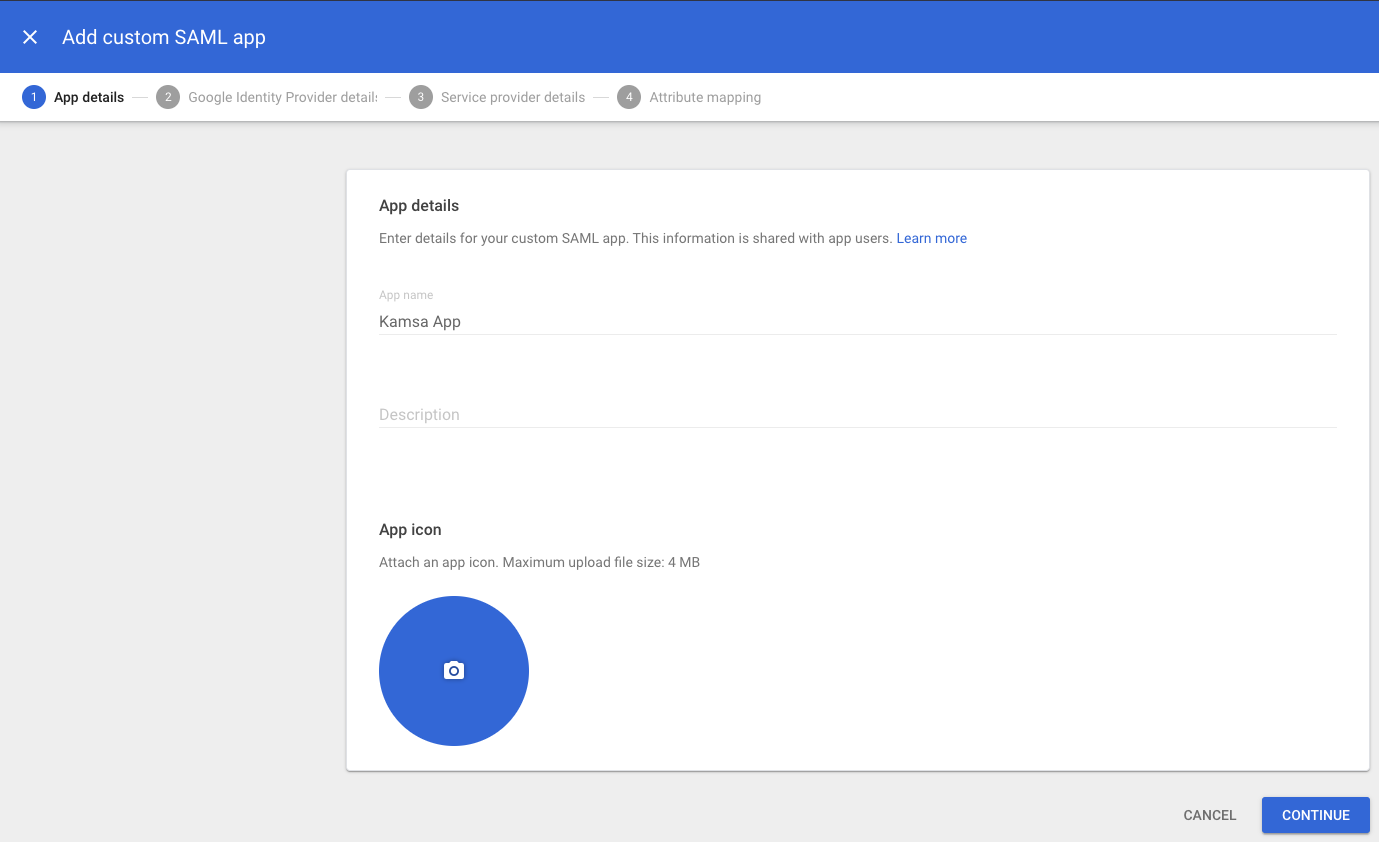
-
Enter a name for your custom app and optionally upload Kamsa Logo. Click "Continue"
-
Download Metadata file, and send your Kamsa Consultant this file. Click "Continue"
-
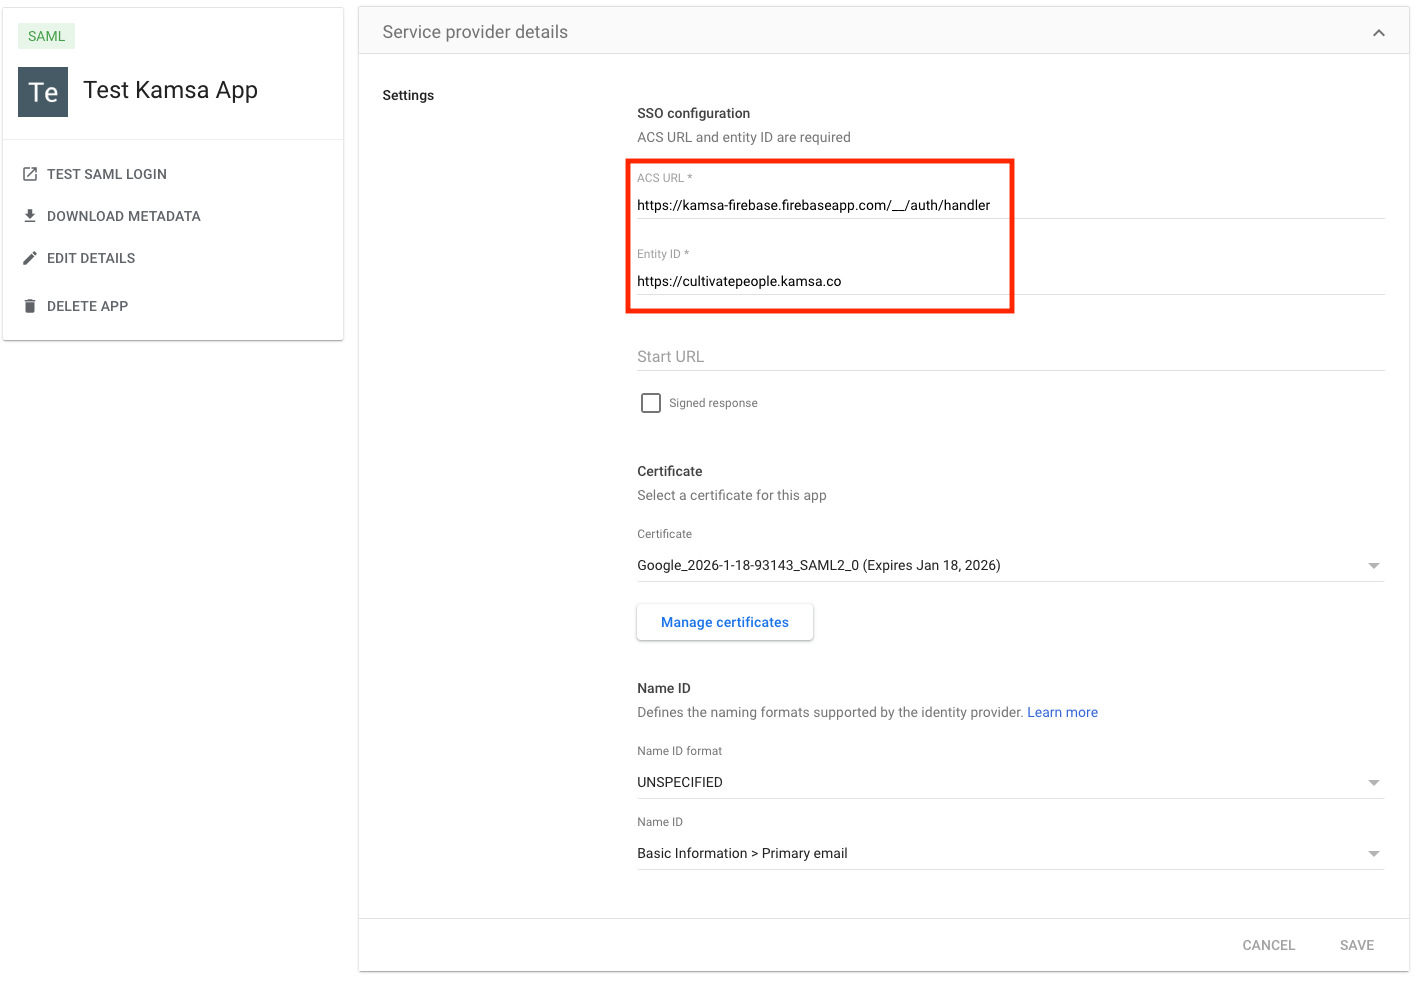
Complete Service Provider Details
- Enter "https://kamsa-firebase.firebaseapp.com/__/auth/handler" for "ACS Url"
- Enter "https://cultivatepeople.kamsa.co/" (with trailing slash) for "Entity ID"
- Unless needed, you can leave the rest of the settings as default
- Click "Continue"
-
Attribute Mapping and Group Membership
- Skip Attribute Mapping
- Optionally can add Group Membership
- Click Finish
-
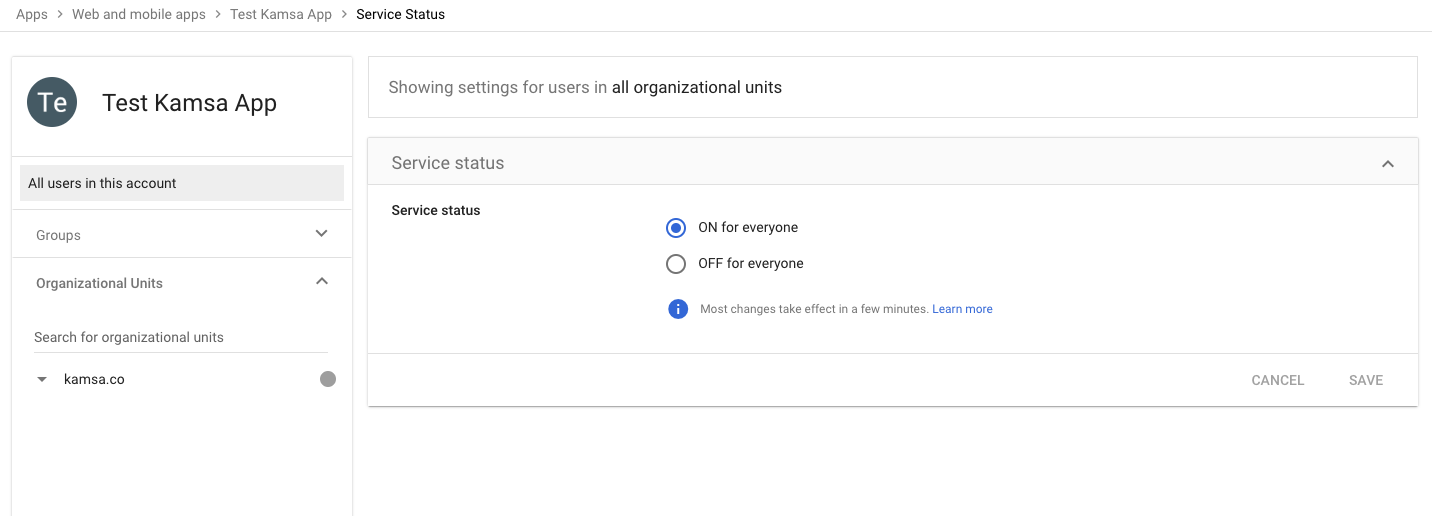
Assign Users
- From the "User access" panel at the top of the page, assign users or groups of people who should have access to Kamsa
- For convenience, you can include all of your users. Only those who have been provisioned an account in Kamsa will get access.
Please forward the Certificate you downloaded to our tech team @ [email protected].
OneLogin - OIDC
-
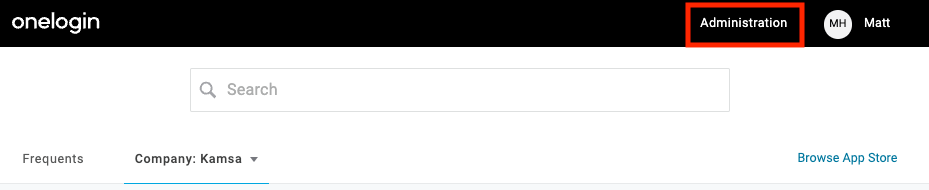
Once into your OneLogin account, go to the Administration panel
-
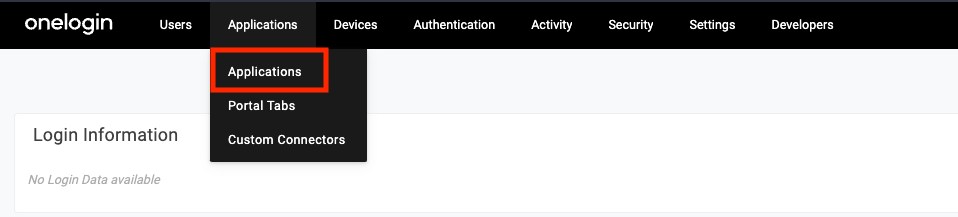
Click "Applications" under the "Applications" menu
-
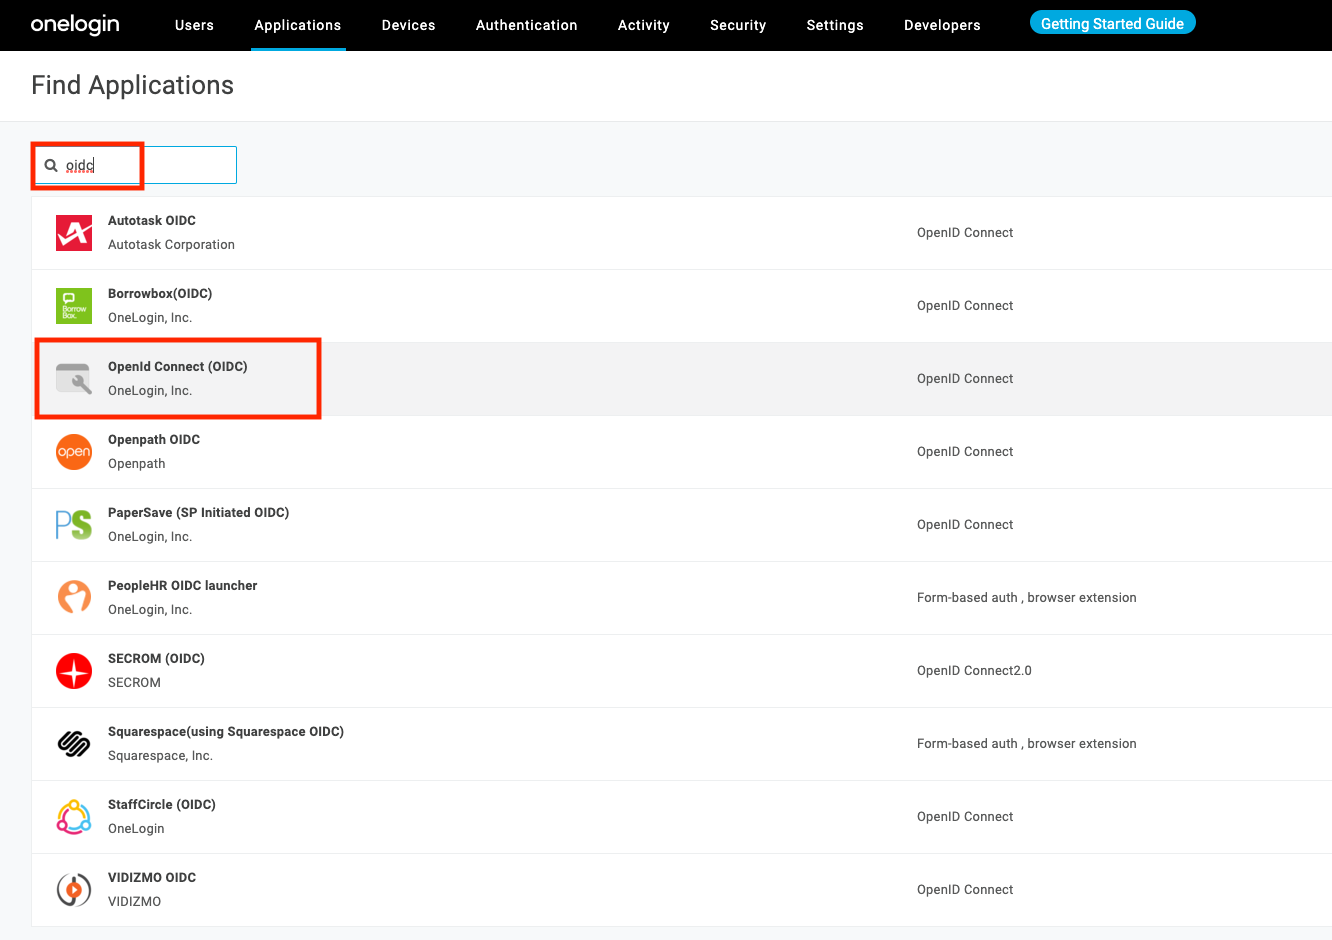
Click "Add App" in the upper right
-
Search for "OIDC" and click "OpenId Connect (OIDC)"
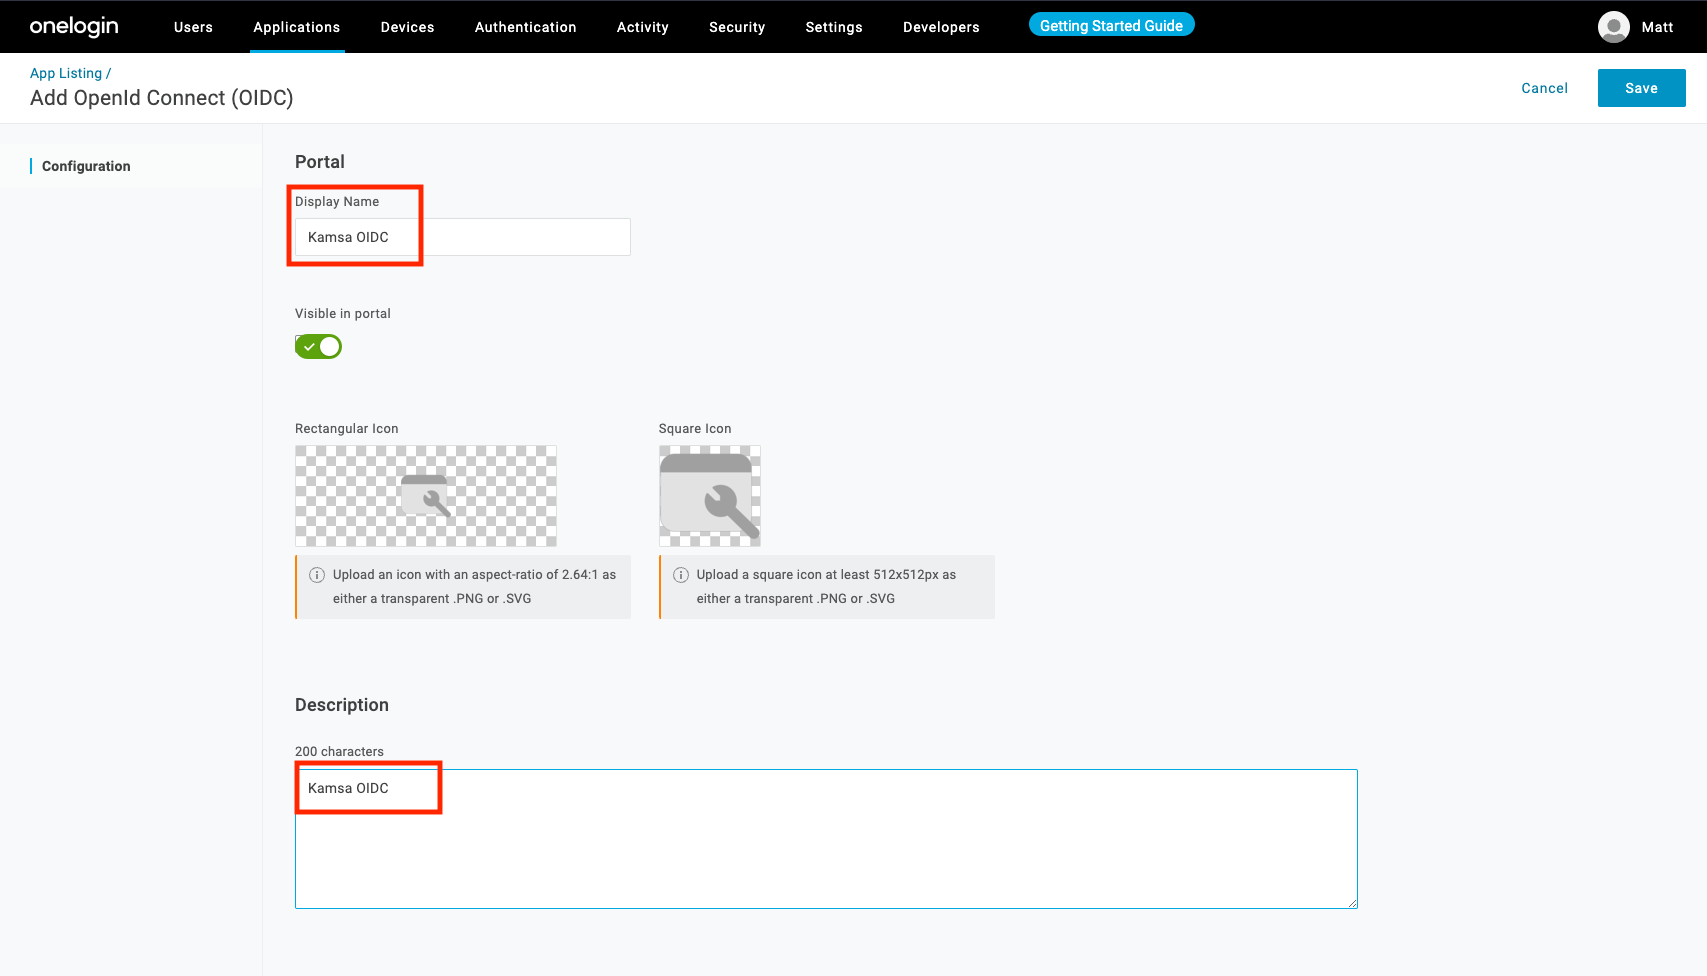
-
Add a meaningful Display Name, optional logo, and optional notes. Click Save
-
Click "Configuration" in the left nav
- Use "https://cultivatepeople.kamsa.co/" for "Login Url" (ensure the trailing slash is present)
- Use "https://kamsa-firebase.firebaseapp.com/__/auth/handler" as the "Redirect URIs"

-
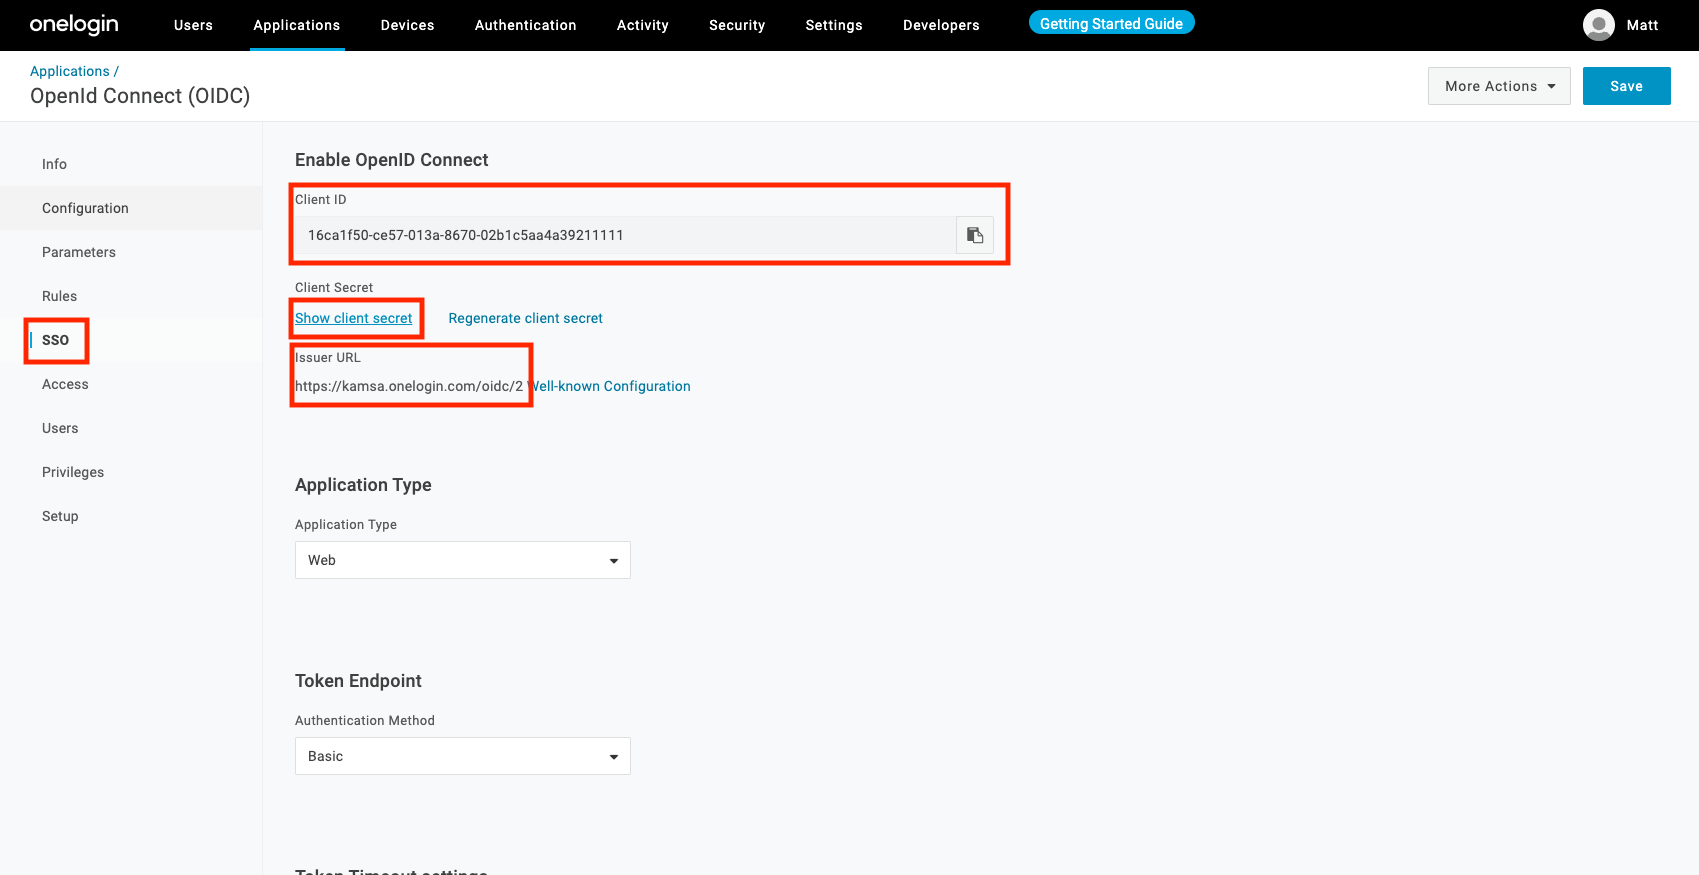
Click "SSO" from the left navigation
-
Copy and send the following to our tech team @ [email protected]:
- Client ID
- Client Secret
- Issuer URL
-
-
Assign Users
- For convenience, you can include all of your users. Only those who have been provisioned an account in Kamsa will get access.

OneLogin - SAML
-
Once into your OneLogin account, go to the Administration panel
-
Click "Applications" under the "Applications" menu
-
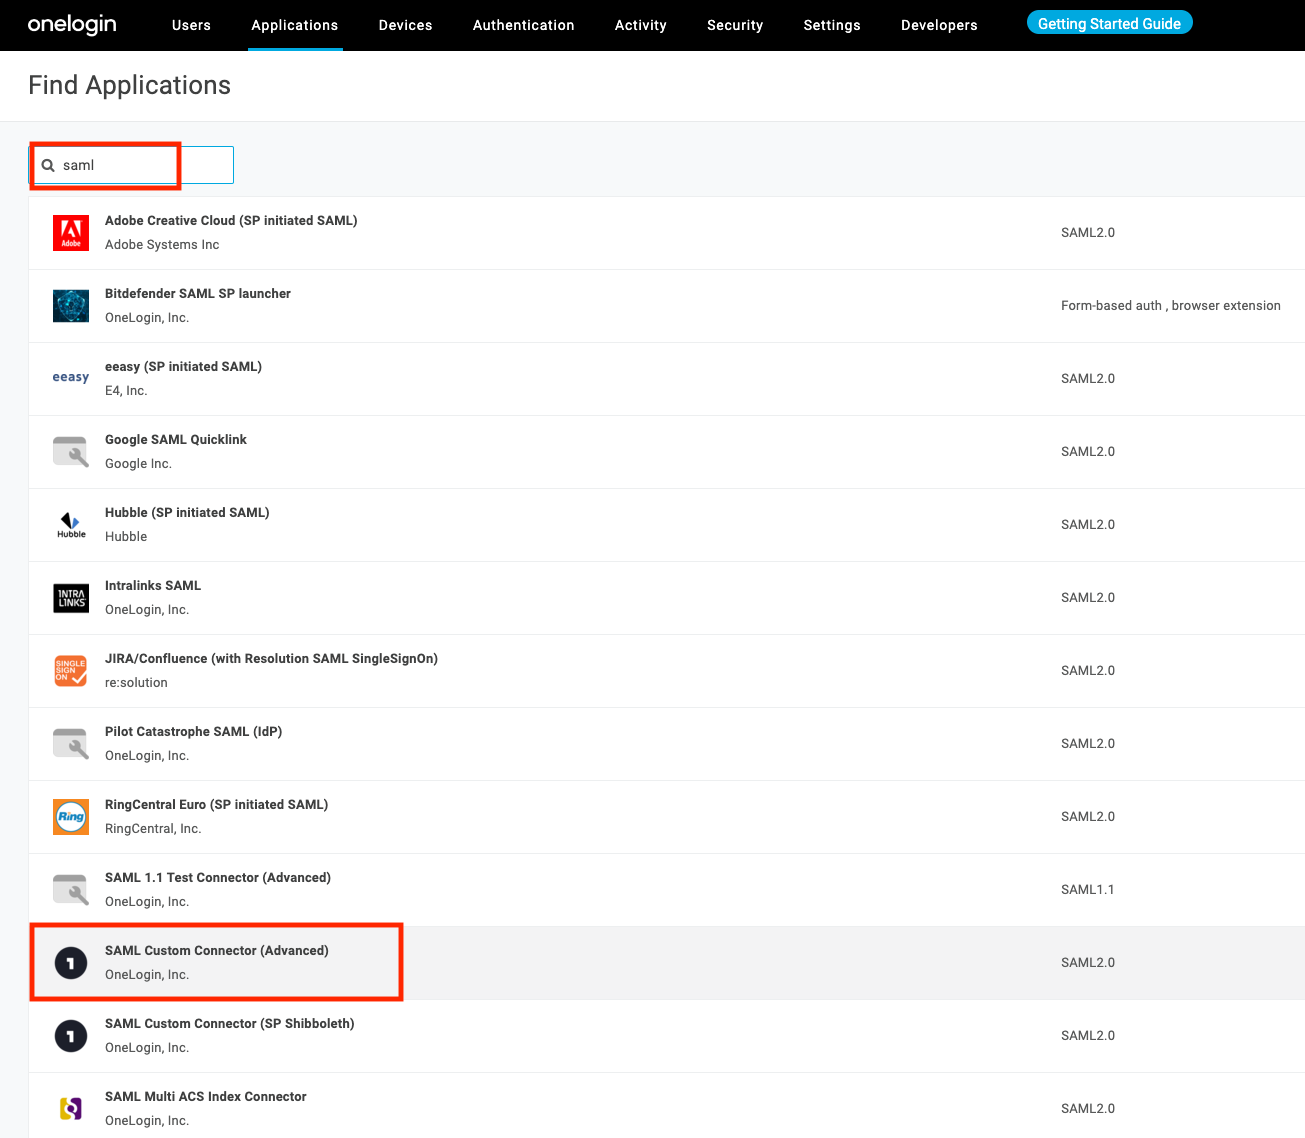
Click "Add App" in the upper right
-
Search for "SAML" and click "SAML Custom Connector (Advanced)"
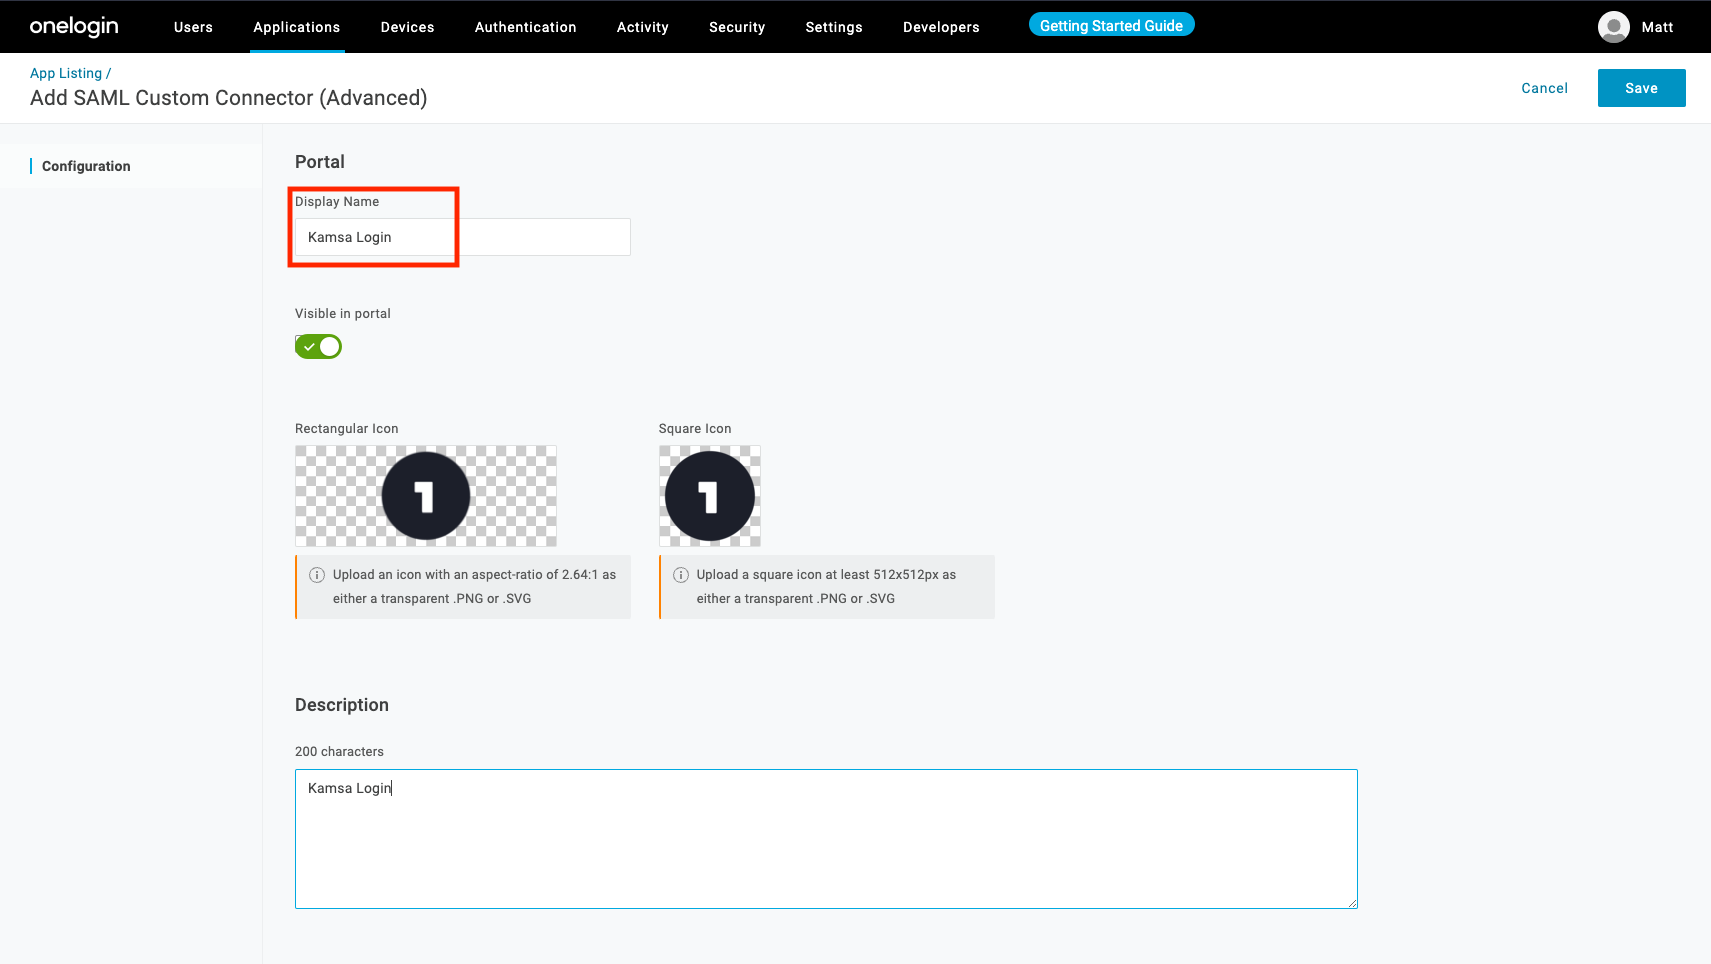
-
Add a meaningful Display Name, optional logo, and optional notes. Click Save
-
Click "Configuration" in the left nav
- Use "https://cultivatepeople.kamsa.co/" for "Audience (EntityID)" (ensure the trailing slash is present)
- Use "https://kamsa-firebase.firebaseapp.com/__/auth/handler" as the "Recipient", "ACS (Consumer) URL Validator", and "ACS (Consumer) URL"
- Select "Service Provider" from "SAML Initiator" dropdown

-
Click "SSO" from the left navigation
-
Click on the "More Actions" dropdown and select "SAML Metadata" to download the file
-
Send the metadata XML file to our tech team @ [email protected]
-
-
Assign Users
- For convenience, you can include all of your users. Only those who have been provisioned an account in Kamsa will get access.
- For convenience, you can include all of your users. Only those who have been provisioned an account in Kamsa will get access.